Jfyi, this post may contain affiliate links to help me continue making more content for you. 😊
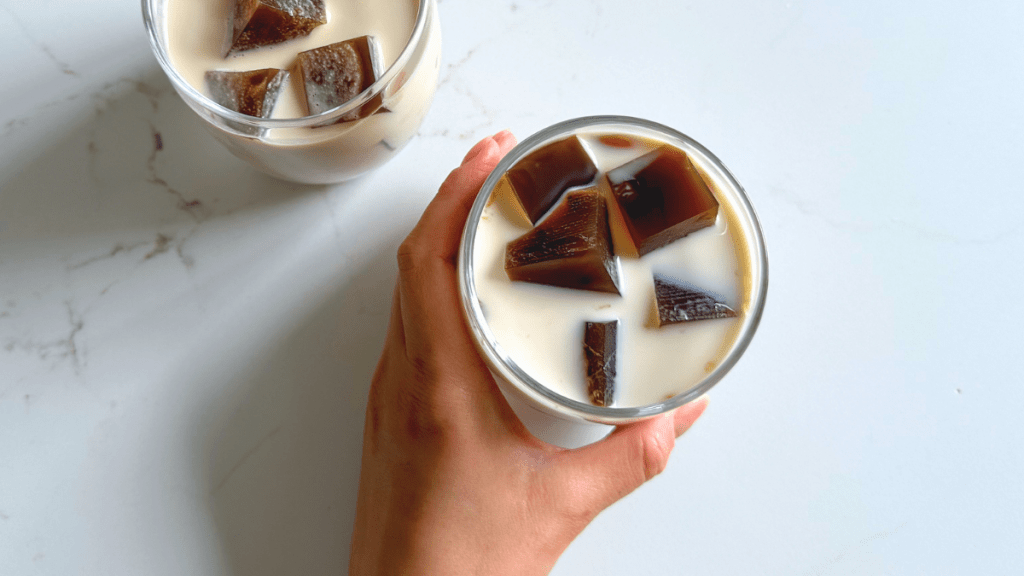
If you’re a coffee lover like me, then this Coffee Jelly is an absolute treat for you to try. It’s inspired by my Japan travels and it’s very easy to make at home. 🌱
I first discovered coffee jelly during my first trip to Japan in 2019 – it was a hot afternoon in Tokyo, and I saw coffee jelly on the menu at one of the Blue Bottle cafes, so I thought it would be a great treat in the heat since it was also served with ice cream. It came out very soft and jiggly, and it fell apart easily. It was so incredibly strong, I realised I was going to be buzzing all night!
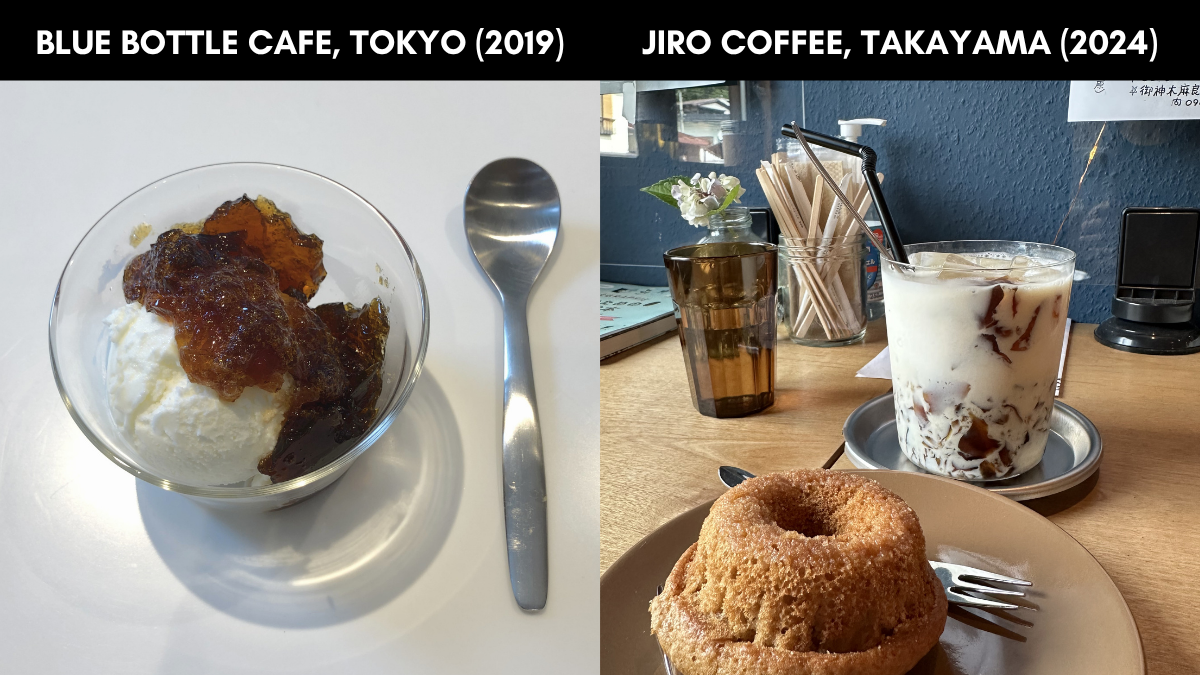
The second time I had it was also back in Japan at a cute little cafe called Jiro Coffee in Takayama – they called theirs ‘Coffee Rich’, which was coffee jelly served in milk. Again, I ordered it because it was a stinking hot day. And again, it was such a strong hit of caffeine that I felt so dehydrated walking back to our hotel in the heat! Do I regret either of those times? Nope.
Why I love this Coffee Jelly
- It’s so easy to make. This is another one of those ridiculous easy recipes! With only five minutes of active prep time, the fridge does most of the work to set the agar jelly.
- It uses plant-based agar powder. I grew up eating agar agar in Malaysia – it’s a popular dessert that is usually fruity. By using agar powder instead of traditional gelatine, we create treat that is completely vegan-friendly and accessible for most dietary requirements.
- It’s a unique ‘adult-ish’ treat. If you’re trying to impress coffee lovers who enjoy affogatos and espressos after meals, then give this coffee jelly a go.
My version of coffee jelly is a bit more solid than the ones you would usually find in Japan, because agar tends to have a firmer set than gelatine. My recipe is also not too strong of a caffeine hit, but if you want that buzz, then go right ahead and make it stronger.
Where can I buy agar in Sydney?
Agar is a popular ingredient in Southeast Asian desserts, so you should be able to find it in powder or strip form at an Asian grocer. You could also try looking in a health food store. Check out my go-to Asian grocery finds here.
A final note on the coffee: I use Leaping Goat coffee beans with my Breville Bambino Plus coffee machine but you can use instant coffee too.
Recipe: Coffee Jelly (Vegan-Friendly)
Servings: It’s a light treat for 3 to 4 people; generous portions for 2 people; or one large batch to enjoy yourself.
Prep time: 5 minutes prep, 30 minutes to 1 hour to cool, and overnight in the fridge to set.
Ingredients
Coffee Jelly Base
2 shots of espresso (Note 1)
400 – 420 mL of water (enough to make a total of 500 mL with your coffee)
2 teaspoons of sugar (Note 2)
2 teaspoons of agar powder (Note 3)
For Serving
Any milk of your choice (I used my creamy homemade cashew milk)
Optional: For an extra indulgent treat – try serving with freshly whipped cream, evaporated milk, or a scoop of vanilla ice cream.
Instructions
Make the agar jelly a day beforehand to ensure it sets perfectly. If you’re still using gelatine powder, simply skip the boiling and cooling down part (steps 3 & 4).
Step 1: Make coffee. Add 2 shots of espresso into a measuring jug. Alternatively, you can brew about 80 to 100 mL of strong instant coffee.
Step 2: Add everything else. Add the rest of the jelly ingredients: the water, your chosen sweetener, and the agar powder. Stir the mixture well to combine.
Step 3: Activate the agar. Transfer the mixture to a saucepan. Bring it to a boil and let it simmer for 2 to 3 minutes while stirring constantly. This step is essential to activate the agar powder.
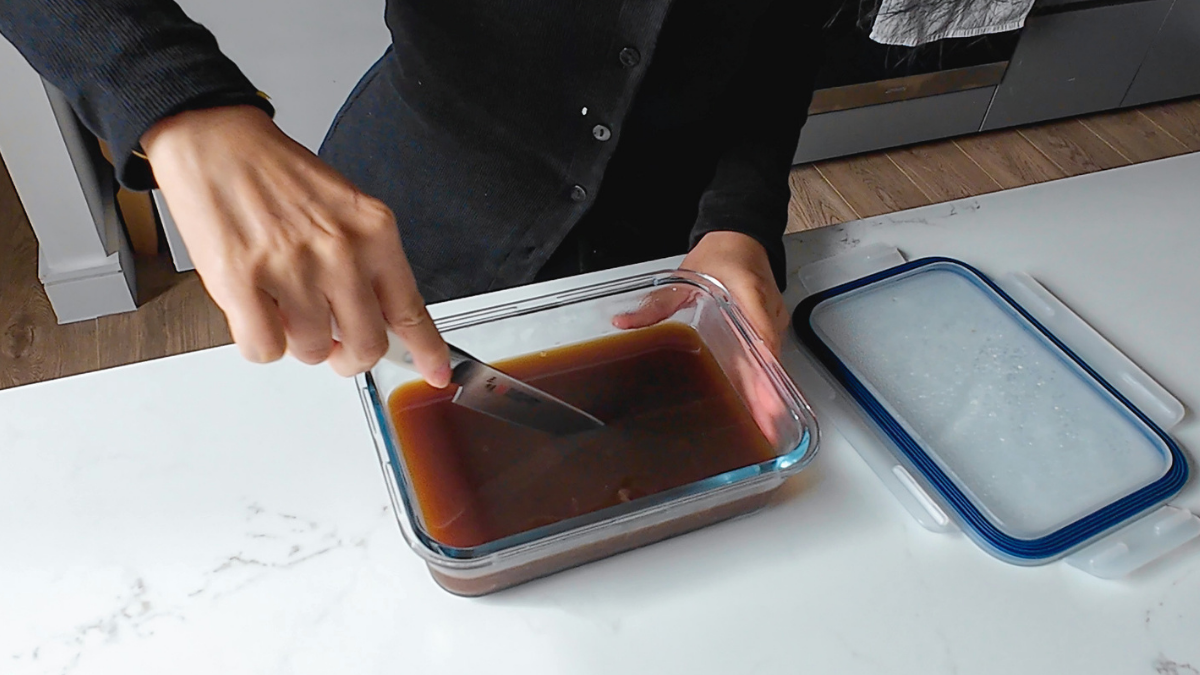
Step 4: Cool down. Pour the liquid into a 1L shallow container. Let the mixture sit on the bench uncovered until it cools down to room temperature.
Step 5: And chill. Once cooled, cover the container and place it in the refrigerator to set overnight.
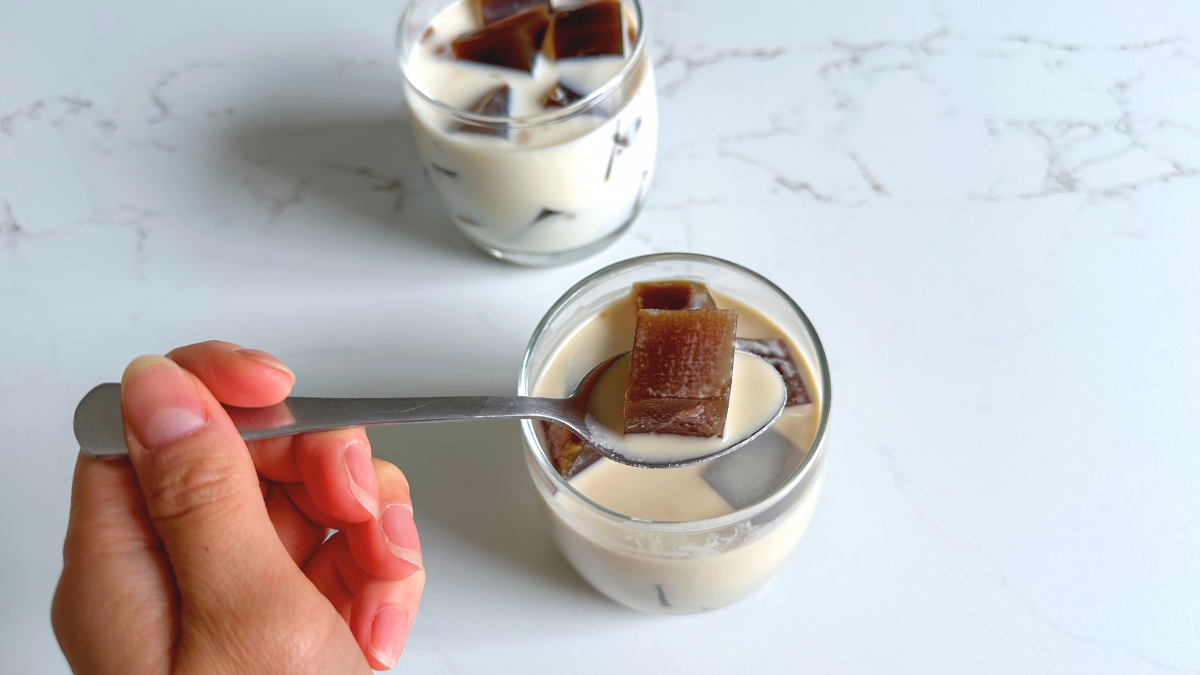
Step 6: Cut it up. Once the coffee jelly is firm, use a sharp knife to cut the jelly into small cubes using a grid pattern.
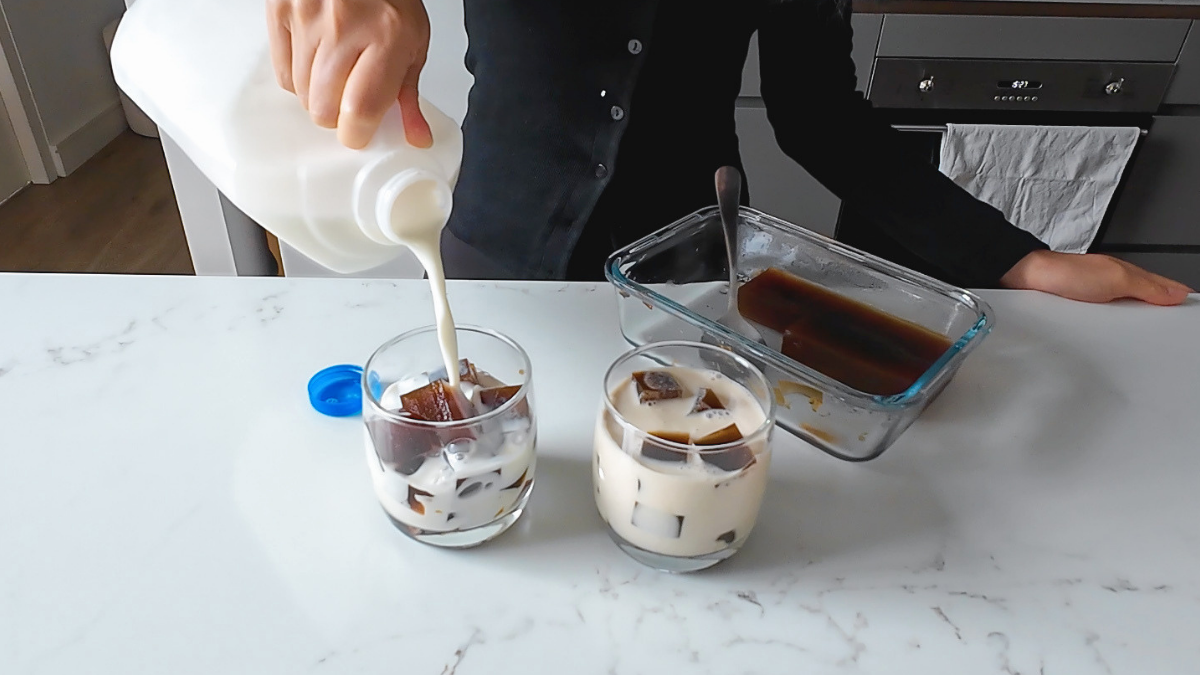
Step 7: Serve it up. Scoop the jelly cubes into small bowls or glasses. Fill the glass with your favourite milk or top it with a generous scoop of ice cream.
Ingredient Notes
Note 1 (The Coffee): Use more espresso if you prefer a stronger, more robust flavour. If you do not have an espresso machine, 2 to 3 teaspoons of high-quality instant coffee powder works perfectly well.
Note 2 (The Sweetener): I used raw sugar for this recipe, but you can substitute this with stevia, maple syrup, or any sweetener you prefer. Adjust the amount to suit your personal taste.
Note 3 (The Setting Agent): Agar is a plant-based setting agent derived from algae. It creates a slightly firmer “snap” than gelatine. If you prefer to use normal gelatine powder, remember that it does not require boiling to activate, but it will not be vegan-friendly.
Enjoy!

Leave a comment